
Set up a Jupyter Notebook#
The Puhti supercomputer has a user interface that allows you to access different applications like Visual Studio Code, Julia, MATLAB, MLflow, RStudio, TensorBoard, and the one we will use Jupyter.
To access the Jupyter application you can simply navigate to the User Interface menu in the Puhti dashboard or opening the Apps menu in the upper menu. If are logged in you can access to the dashboard using this link:
CSC Puhti dashboard!
To access Puhti dashboard you need to log in with a CSC account or HAKA credentials.
Simply, to start the Jupyter Notebook click on the Jupyter button, like in Figure 1.
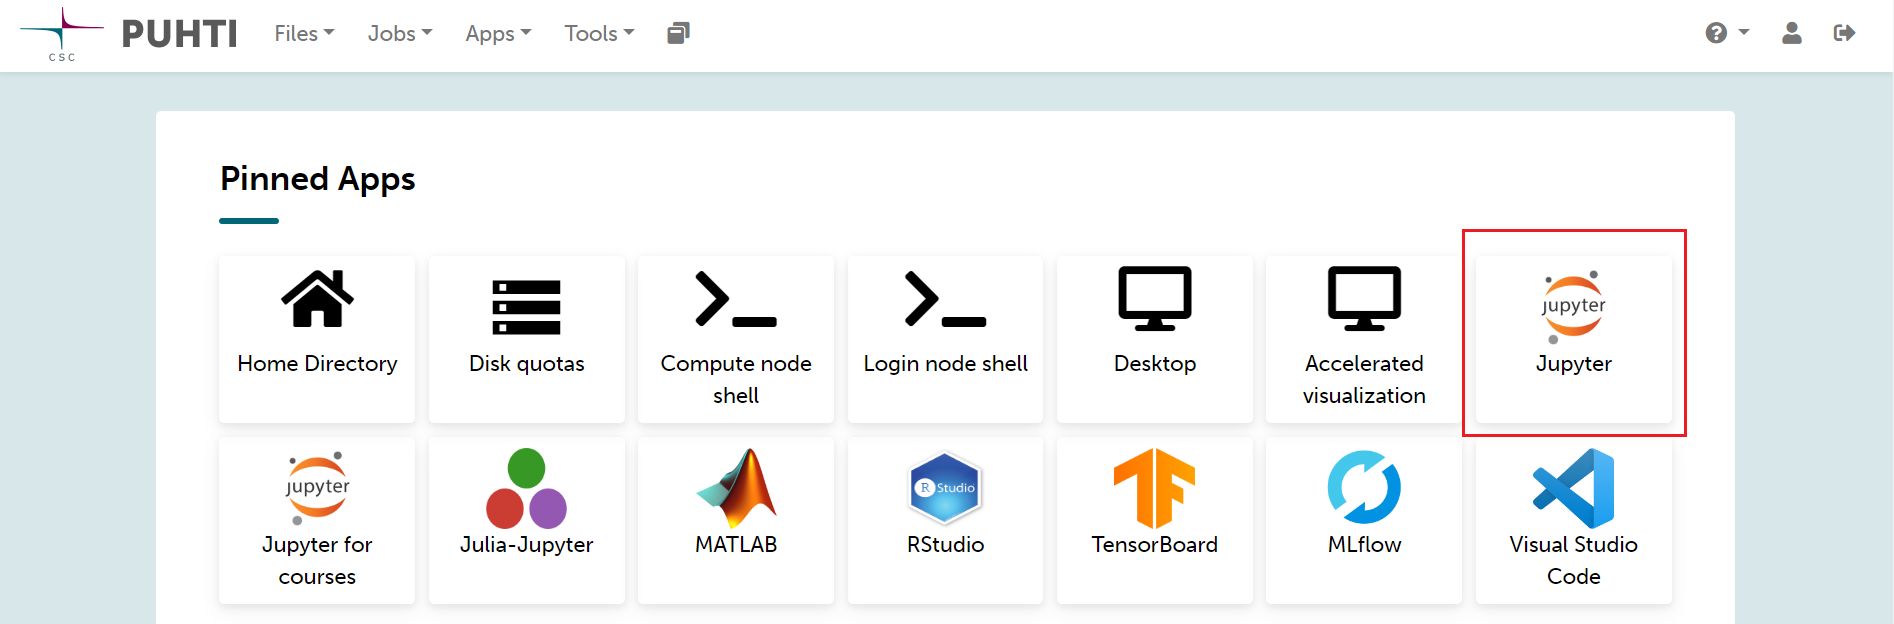
Figure 1. Puhti - Dashboard and Jupyter#
Then, you will see how the Jupyter session starts where you can set up the resources for your Jupyter Notebook. Be sure you have selected your own project like project_200xxxx. In this case, we are using partition small which has maximum 40 cores which is more than enough for our need. If you are willing to know more about the partitions find it in the Puhti Partitions Documentation.
For the other parameters, we will reserve 8 cores, 32 GB of processing memory, 60 GB of local disk, and 2 hours of availability. Your resources for now should look like Figure 2.

Figure 2. Puhti - Jupyter configuration#
If you continue scrolling down you will find the Settings section. Under the Python parameter you should choose Custom Path. Then, in the Custom Python interpreter you should add the directory of your installed environment container.
Copy and paste the location of the environment from here (be sure you replace 200xxxx with your project number):
/projappl/project_200xxxx/GIT-HPC/env_container/bin/python
Then, choose Lab as Jupyter type and select your Working directory which should be under projappl.
The Settings section might look like Figure 3.

Figure 3. Puhti - Jupyter and Custom Python interpreter#
Finally, press the Launch button. You will see the session is launching untill it confirm it is Running. It will look like Figure 4.

Figure 3. Puhti - Jupyter and Custom Python interpreter#
Then, press the button Connect to Jupyter and Jupyter Lab will open.
Find the Lessons in the cloned repository under:
/GIT-HPC/GeoHPC/source/lessons
The Launcher menu and Directory should look like Figure 4.
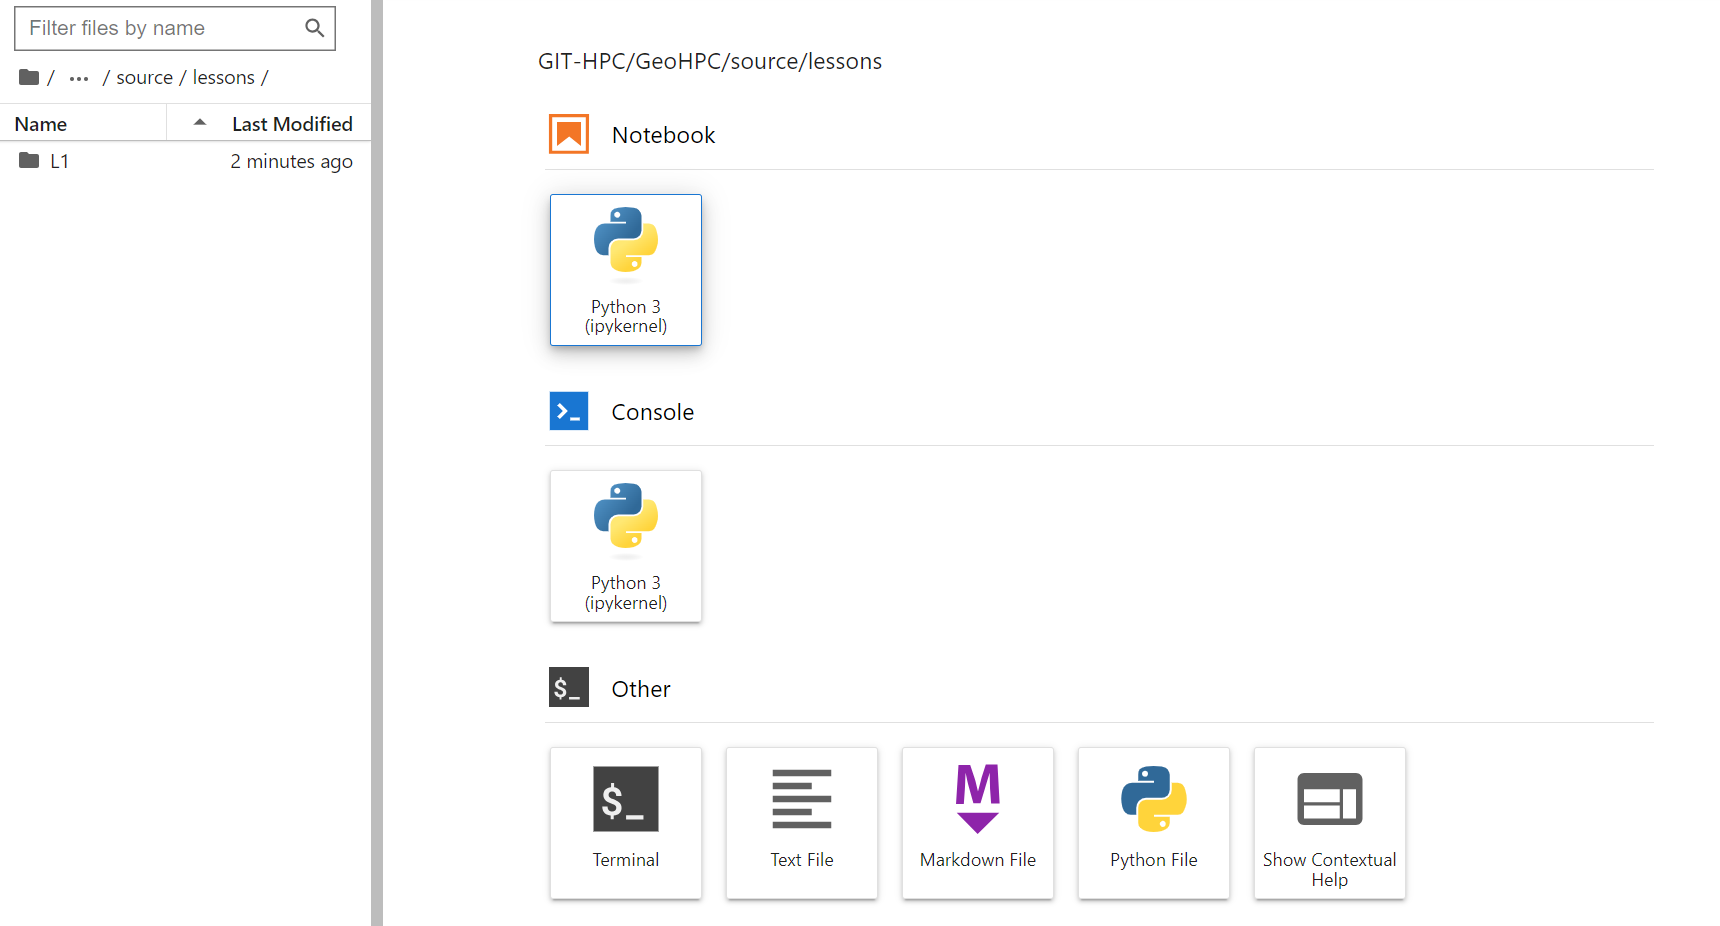
Figure 4. Puhti - Jupyter Lab and Launcher in lessons directory#
Every folder is named with L and the number of the lesson. For example, the notebook for lesson 1 in L1. The notebook name contains simply keywords of the lesson like Shortest Path.
Open the Jupyter Notebook of Lesson 1 from:
/GIT-HPC/GeoHPC/source/lessons/L1/01_ShortestPath-Parallelization.ipynb
If you have reached until here you are able to start the Lesson 1 using HPC resources and a customized environment container. Follow up the instruction in the Jupyter Notebook. Happy coding!.